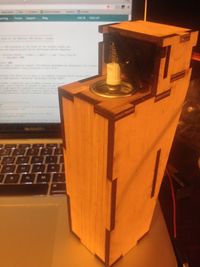
Making a Tabbed Box using the Laser Cutter
Jump to navigation
Jump to search

The tabbed box is one of the simplest and most useful things to design for the laser cutter. There are several online applications that will take your input and allow you to download an .svg file that can be incorporated into Inkscape, CorelDraw, or Illustrator. In my view, using an Inkscape extension is by far the easiest way to design your box and make adjustments right in Inkscape itself.

- 1. Download the BoxMaker Extension for Inkscape (BoxMaker) or download the .zip file from here.
- 2. Open the .zip file and copy the files “boxmaker.inx” and “boxmaker.py” into your Inkscape extensions folder (usually \Program Files\Inkscape\share\extensions\”).
- 3. Restart Inkscape, then click on the “Extensions” menu and highlight the heading “Laser Tools”.
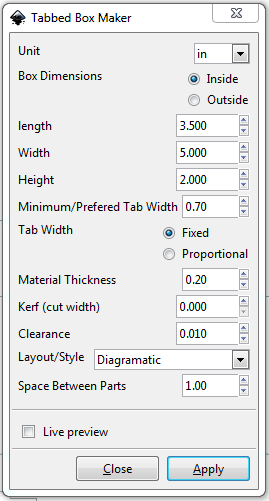
- 4. Select “Tabbed Box Maker”, a pop-up menu will appear asking for the properties of the box you would like to design.
- a. Select your measurement units.
- b. Inside/Outside refers to whether your measurement dimensions are for the inside of the box or the outside.
- c. Enter your dimensions and preferred tab width (note, if you select a tab width too big or too small for the box dimensions, the extension will give you an error message.)
- d. Enter the thickness of the material you are going to make the box out of.
- e. The kerf for a laser cutter can be kept at zero.
- 5. Click “Apply”, then close the extension. Your box parts should be in your open Inkscape screen ready for further editing.
- 6. Remember to set the line widths to 0.001” to make sure that they cut instead of etch.
Timothy M. Schuler, Ph.D. (talk)
Also a good option is this website which allows you to download laser cut plans for a box through user inputs:
http://www.makercase.com/