Ultimaker 2: Difference between revisions
Clayton.ford (talk | contribs) (Created page with "250px|thumb|right|Example Image of an Ultimaker 2 The Ultimaker 2 is likely the simplest of the 3d printers in the MakerSpace, and so is likely the...") |
|||
| (3 intermediate revisions by 2 users not shown) | |||
| Line 1: | Line 1: | ||
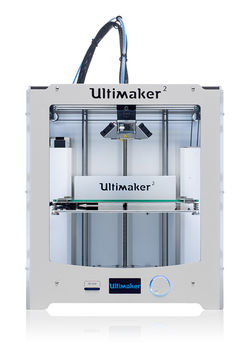
[[File:Ultimaker2.JPG|250px|thumb|right|Example Image of an Ultimaker 2]] | [[File:Ultimaker2.JPG|250px|thumb|right|Example Image of an Ultimaker 2]] | ||
The Ultimaker 2 is | The Ultimaker 2 is the simplest of the [[3d printers]] in the MakerSpace, and so is likely the easiest for beginners to 3d printing to get started with. | ||
== Cura Configuration == | == Cura Configuration == | ||
Open the LulzBot version of [[Cura]] and follow the following steps: | Open the LulzBot version of [[Cura]] and follow the following steps: | ||
| Line 6: | Line 6: | ||
*Click the "Machine" drop-down menu and select "Add New Machine". | *Click the "Machine" drop-down menu and select "Add New Machine". | ||
*Select "Other Printers" and click next. | *Select "Other Printers" and click next. | ||
*Select "Ultimaker 2" and click next. | *Select "Ultimaker 2" or "Ultimaker 2+" and click next. | ||
*Click "Finish". | *Click "Finish". | ||
| Line 13: | Line 13: | ||
== Technical Details == | == Technical Details == | ||
*0.4mm nozzle | *0.4mm nozzle | ||
*260C maximum extruder temperature | *260C maximum extruder temperature | ||
*100C maximum bed temperature | *100C maximum bed temperature | ||
| Line 23: | Line 23: | ||
The bed leveling procedure is a menu option on the Ultimaker 2. Select it and follow the on-screen instructions in order to level the bed. | The bed leveling procedure is a menu option on the Ultimaker 2. Select it and follow the on-screen instructions in order to level the bed. | ||
== Miscellaneous Notes == | == Miscellaneous Notes == | ||
After time, the Ultimaker 2 can develop a problem with "under-extrusion", where material is not able to be pushed through the nozzle effectively. This is often due to a build-up of burnt material on the small plastic part that feeds the filament into the nozzle. While it is best to simply replace the plastic part, if a replacement is not available it can be removed and re-opened by drilling out the center with a cordless drill. See instructions for removing the part [https://ultimaker.com/en/resources/250-disassembly here]. | |||
Latest revision as of 04:50, 20 February 2017

The Ultimaker 2 is the simplest of the 3d printers in the MakerSpace, and so is likely the easiest for beginners to 3d printing to get started with.
Cura Configuration
Open the LulzBot version of Cura and follow the following steps:
- Click the "Machine" drop-down menu and select "Add New Machine".
- Select "Other Printers" and click next.
- Select "Ultimaker 2" or "Ultimaker 2+" and click next.
- Click "Finish".
Recommended Print Configurations
Ultimaker 2 Print Configurations
Technical Details
- 0.4mm nozzle
- 260C maximum extruder temperature
- 100C maximum bed temperature
- Glass print bed
- Print Area: 223 x 223 x 205 mm
- Top Print Speed: 300mm/sec
Bed Leveling
The bed leveling procedure is a menu option on the Ultimaker 2. Select it and follow the on-screen instructions in order to level the bed.
Miscellaneous Notes
After time, the Ultimaker 2 can develop a problem with "under-extrusion", where material is not able to be pushed through the nozzle effectively. This is often due to a build-up of burnt material on the small plastic part that feeds the filament into the nozzle. While it is best to simply replace the plastic part, if a replacement is not available it can be removed and re-opened by drilling out the center with a cordless drill. See instructions for removing the part here.