Printing with Orca Slicer: Difference between revisions
Bhermanoff (talk | contribs) No edit summary |
Bhermanoff (talk | contribs) No edit summary |
||
| (5 intermediate revisions by the same user not shown) | |||
| Line 7: | Line 7: | ||
== Creating or Opening a Project == | == Creating or Opening a Project == | ||
[[File:OrcaMenu.jpg|thumb| | [[File:OrcaMenu.jpg|thumb|none| Maybe you are designing a product, and are making multiple revisions are requiring the same settings. Saving a project file and just modifying the model inside the project may prove efficient.]] | ||
From the Homescreen, you can create a new project, or open an existing one. Projects contain not just STL files, but all modified settings for a job. | From the Homescreen, you can create a new project, or open an existing one. Projects contain not just STL files, but all modified settings for a job. | ||
| Line 14: | Line 14: | ||
== Adding Files == | == Adding Files == | ||
[[File:Orca new project.jpg|500px|thumb| | [[File:Orca new project.jpg|500px|thumb|none]] | ||
With a blank (new) project, you will be presented with the '''Prepare Screen'''. One empty plate will be shown. | With a blank (new) project, you will be presented with the '''Prepare Screen'''. One empty plate will be shown. | ||
| Line 20: | Line 20: | ||
You can position, rotate, scale, and mirror your print using the top tool panel. As well as autoarrange and duplicate models by right clicking them. | You can position, rotate, scale, and mirror your print using the top tool panel. As well as autoarrange and duplicate models by right clicking them. | ||
== Selecting Printer and Filament == | == Selecting Printer and Filament == | ||
| Line 41: | Line 42: | ||
* '''Filament: What's loaded!''' Make sure this is the same as what is loaded! We provide PLA for free, if you have a specific type or color of filament, bring your own in and ask a FabTech to load it for you! | * '''Filament: What's loaded!''' Make sure this is the same as what is loaded! We provide PLA for free, if you have a specific type or color of filament, bring your own in and ask a FabTech to load it for you! | ||
* '''Print Profile''' This determines which print profile to base your slice settings off of. Standard is good for most! To learn more about slice settings keep reading. | * '''Print Profile''' This determines which print profile to base your slice settings off of. Standard is good for most! To learn more about slice settings keep reading. | ||
== Slicing Settings == | == Slicing Settings == | ||
| Line 61: | Line 60: | ||
[[File:15 vs 40 infill.jpg|400px|thumb|center|'''On the Left: 40% infill density. On the Right: 15% infill density''' Don't overdo infill! 15% is incredibly strong already! Don't waste plastic unless you have a very structural part.]] | [[File:15 vs 40 infill.jpg|400px|thumb|center|'''On the Left: 40% infill density. On the Right: 15% infill density''' Don't overdo infill! 15% is incredibly strong already! Don't waste plastic unless you have a very structural part.]] | ||
==== Infill Patterns ==== | |||
'''Triangles''' is an infill pattern consisting of triangles, this pattern is great if you are looking for a print that is strong in the XY plane. | '''Triangles''' is an infill pattern consisting of triangles, this pattern is great if you are looking for a print that is strong in the XY plane. | ||
| Line 71: | Line 70: | ||
'''Lightning''' is an infill pattern that models itself after an upside-down lightning bolt. This pattern uses close to no infill unless absolutely necessary! This is the fastest infill pattern, and is amazing if you just need a model that prints as fast as possible, or if you don't need your print to be strong and want to save plastic! | '''Lightning''' is an infill pattern that models itself after an upside-down lightning bolt. This pattern uses close to no infill unless absolutely necessary! This is the fastest infill pattern, and is amazing if you just need a model that prints as fast as possible, or if you don't need your print to be strong and want to save plastic! | ||
==== Walls ==== | |||
Walls are the outer-most section of your print, and are what you see on the outside. They also can influence the strength of your prints. '''If you opt to have thicker walls, you will have much stronger prints.''' If you have a print that has some smaller features that need to be strong, '''creating thicker walls can be much more effective than increasing infill''' for increasing part strength . | Walls are the outer-most section of your print, and are what you see on the outside. They also can influence the strength of your prints. '''If you opt to have thicker walls, you will have much stronger prints.''' If you have a print that has some smaller features that need to be strong, '''creating thicker walls can be much more effective than increasing infill''' for increasing part strength . | ||
Latest revision as of 16:42, 28 August 2023
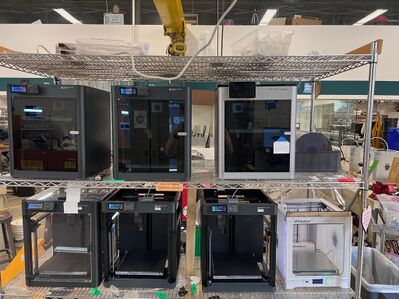
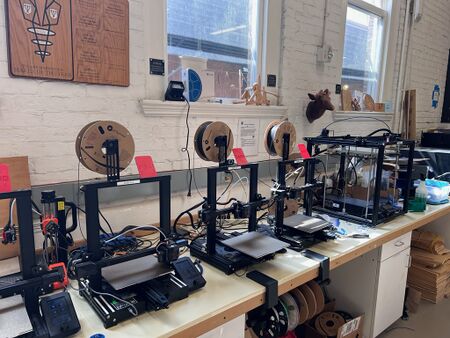
The Ender printers are equipped each with their own OctoPrint Server. This server allows for prints to be sent directly from our 3D printing computer located next to the Ender Printers. The Bambu P1 and X1 series printers are equipped with an onboard printserver through BambuCloud, OrcaSlicer can Print to any of our printers through these services.
We require that you slice and start printing from OrcaSlicer on our 3D printing computer, which is configured specifically for our printers.
Creating or Opening a Project
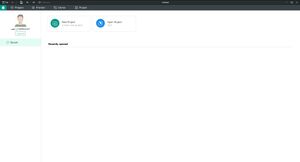
From the Homescreen, you can create a new project, or open an existing one. Projects contain not just STL files, but all modified settings for a job.
Adding Files
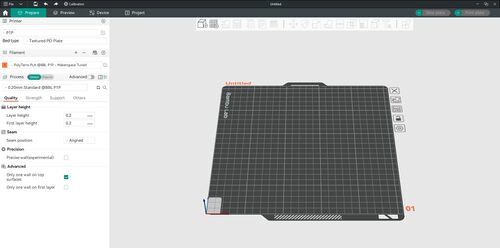
With a blank (new) project, you will be presented with the Prepare Screen. One empty plate will be shown.
To start, drag your STL or 3MF file onto the new plate, or use File->Import.
You can position, rotate, scale, and mirror your print using the top tool panel. As well as autoarrange and duplicate models by right clicking them.
Selecting Printer and Filament
The most important configuration that must be made is selecting the printer and filament type.
Find the printer you want, and set the profile at the top left of the screen. Bambu Printers all share profiles between their respective model, while Ender series are individual.If printing to a Bambu printer, you will select the exact printer # later.
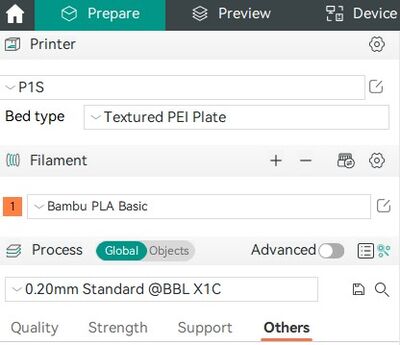
Select an open printer from the dropdown list, and make sure you are setting all 4 dropdowns!
- Printer: The printer you are printing to! Note that for Bambu printers, the exact printer is not selected here, just make sure to get the model name right!
- Bed: The Bed type of the printer All our printers (except the Bambu X1 Series) use Textured PEI Beds.
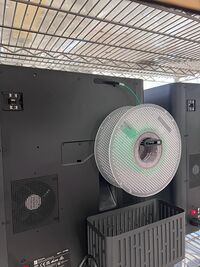
- Filament: What's loaded! Make sure this is the same as what is loaded! We provide PLA for free, if you have a specific type or color of filament, bring your own in and ask a FabTech to load it for you!
- Print Profile This determines which print profile to base your slice settings off of. Standard is good for most! To learn more about slice settings keep reading.
Slicing Settings
On the left panel of Orca are slicer settings. These determine many physical properties of your print, as well as the properties of the printer. If you are a beginner, and we recommend turning off the "advanced" slider on Orca, this will reduce accessible settings to the most changed ones. Talk to a FabTech to learn more about advanced features if you want to get a specific property out of your print.
Quality
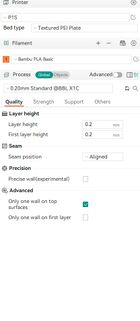
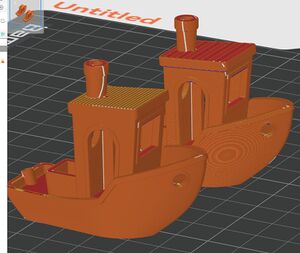
The Layer Height of a print determines the vertical resolution of your print, with a lower value taking more slices of the print. This drastically increases and decreases print time, and is the basis for most profiles.
Strength
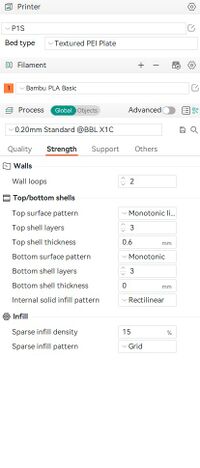
To decrease plastic use and print time, all of our prints are mostly hollow on the inside. To influence the properties of the inside your prints, you can change your infill settings.
Sparse infill density influences how much of your model is plastic on the inside. We recommend this be low unless you truly need a strong part. This setting will greatly increase print time and plastic usage.
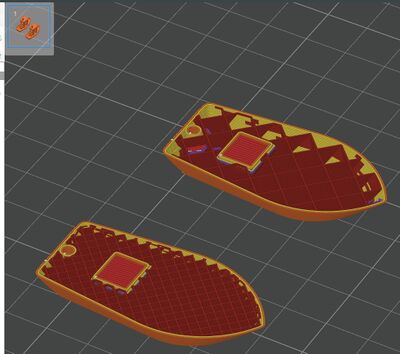
Infill Patterns
Triangles is an infill pattern consisting of triangles, this pattern is great if you are looking for a print that is strong in the XY plane.
Gyroid is an infill pattern consisting of a rotating sine wave, this pattern is great if you are looking for a print that is strong in the Z axis.
Cubic is an infill pattern consisting of squares, this pattern is great if you are looking for a fast print speed, but still need the print to be relatively strong
Lightning is an infill pattern that models itself after an upside-down lightning bolt. This pattern uses close to no infill unless absolutely necessary! This is the fastest infill pattern, and is amazing if you just need a model that prints as fast as possible, or if you don't need your print to be strong and want to save plastic!
Walls
Walls are the outer-most section of your print, and are what you see on the outside. They also can influence the strength of your prints. If you opt to have thicker walls, you will have much stronger prints. If you have a print that has some smaller features that need to be strong, creating thicker walls can be much more effective than increasing infill for increasing part strength .
Supports
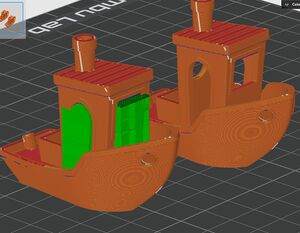
If your print has any overhanging structure, you will need supports. We recommend using Tree supports if they are suitable for your print. Once you slice, you can check the preview to see if your tree supports support your print as necessary. Otherwise, you will need to use the default support structure.
Additionally, you can use the support painting tool along with (manual) support types to add or block supports onto specific regions of your print.
Build Plate Adhesion
Brim adds an extra bit of plastic on the first layer of your print. This can help with small objects not sticking to the bed and moving during printing. Orca Slicer has its auto brim setting on by default, but if you find that you want to manually disable or enable a brim on a print you can do so from the other tab.
Having any Build Plate Adhesion settings turned on will decrease the available area to print on. If you need every last millimeter of the print bed, disable Build Plate Adhesion.
Sending Prints to a Printer
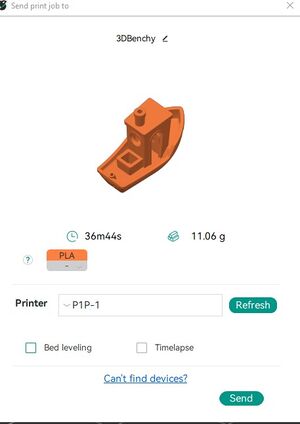
Once you slice your model, we recommend you take a look at the preview screen to see a preview of your print settings. You can drag the right side bar down to see inside your prints layers, and get a look at what your infill looks like. This is also a great way to verify your supports are sufficient for your model.
After you have checked your preview, you can select "Print" from the top right. This will send your print to the printer you have selected, or prompt you to select a specific printer if its a Bambu.
Make sure to fill out a print card with your name, phone #, print name, duration, and start time.
