Using the 3D Printers: Difference between revisions
No edit summary |
No edit summary |
||
| Line 1: | Line 1: | ||
==Introduction== | ==Introduction== | ||
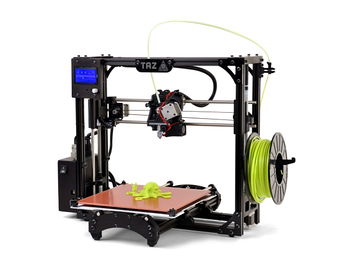
[[File:TAZ_5.jpg|350px|right]] | [[File:TAZ_5.jpg|350px|right|A Lulzbot Taz 5 printer]] | ||
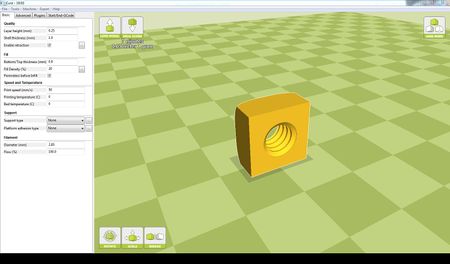
[[File:Taz_CURA.JPG|450px|right]] | [[File:Taz_CURA.JPG|450px|right|Screenshot of Cura for the Taz 5]] | ||
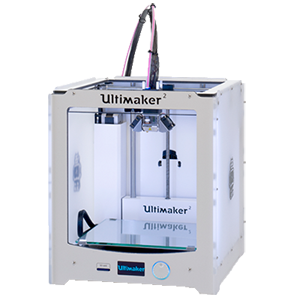
[[File:Ultimaker_2.png|350px|right]] | [[File:Ultimaker_2.png|350px|right|An Ultimaker 2 printer]] | ||
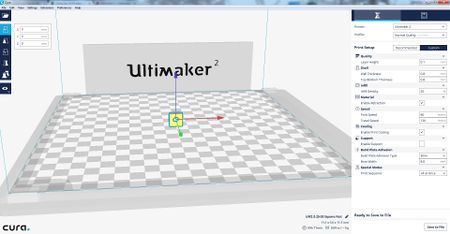
[[File:Ultimaker_CURA.JPG|450px|right]] | [[File:Ultimaker_CURA.JPG|450px|right|Screenshot of Cura for the Ultimaker 2]] | ||
Once you have a 3d model that is ready to print (saved as an ".stl" output file), the next step is to translate it into a set of instructions for the 3d printer. Each printer will only work with instructions set to its specific machine language (.gcode), and to generate the instructions we need to use "slicing" software. The slicing software that we recommend for using both the Taz 5 and Ultimaker 2 is called [[Cura]], but note that each type of 3d printer has its own version of Cura and using the correct version will often result in fewer problems with your print. | Once you have a 3d model that is ready to print (saved as an ".stl" output file), the next step is to translate it into a set of instructions for the 3d printer. Each printer will only work with instructions set to its specific machine language (.gcode), and to generate the instructions we need to use "slicing" software. The slicing software that we recommend for using both the Taz 5 and Ultimaker 2 is called [[Cura]], but note that each type of 3d printer has its own version of Cura and using the correct version will often result in fewer problems with your print. | ||
Revision as of 18:27, 22 December 2016
Introduction


Once you have a 3d model that is ready to print (saved as an ".stl" output file), the next step is to translate it into a set of instructions for the 3d printer. Each printer will only work with instructions set to its specific machine language (.gcode), and to generate the instructions we need to use "slicing" software. The slicing software that we recommend for using both the Taz 5 and Ultimaker 2 is called Cura, but note that each type of 3d printer has its own version of Cura and using the correct version will often result in fewer problems with your print.
Get Started
1. Open the version of Cura that corresponds to the printer you would like to use. When open it will show an empty print bed with a list of options on the side of the screen.
2. To bring your model into Cura, you can either selecting the "Load Model" option or simply drag your .stl file onto the empty print bed.
3. You can re-arrange your object on the print bed by selecting it (clicking on the object) and then choosing the "Rotate" option. Click on one of the three axes and rotate your object so that it rests flat on the print bed.
4. If you'd like to scale your object's size, select and choose the "Scale" option. It is a good idea to keep your dimensions locked when scaling, so that its proportions aren't allowed to change.
5. Next you can start setting your basic options:
- Layer Height (mm) - Recommended between 0.38 and 0.06 mm. This is essentially the quality of the print, smaller layer heights will result in a higher "resolution" print but will also make the print take much longer to finish. Note that the Ultimaker 2 is higher resolution printer than the Taz 5, which shouldn't have a layer thickness less than 0.15.
- Shell Thickness (mm) - Recommended 1 mm. This is the thickness of the outer shell of your object.
- Enable Retraction - ON.
- Bottom/Top Thickness (mm) - Recommended = 4 x "Layer Height". We usually recommend about 4 layers to be printed on the bottom and top in order to create a stable print, however if your layer height is small you may want to consider adding more layers.
- Fill Density (%) - Recommended 20%. This describes how much material will be used inside the solid shell of your print. 100% is a completely solid print, but that is rarely necessary and your print will finish much faster if you lower the fill density to about 20%.
- Perimeters before infill - ON.
- Print Speed (mm/s) - Recommended 50 mm/s.
- Printing Temperature (C) - Recommended 215 or 230 C. This depends on the material being used, PLA prints at 215 C while ABS prints at 230 C.
- Bed Temperature (C) - Recommended 60 C or 110 C. Again depending on the material, PLA should be at 60 C while ABS should be at 110 C.
- Support Type - Recommended "Everywhere" or "None". If your model is designed to not need support select "none", otherwise allow Cura to place support wherever it decides you will need it.
- Platform Adhesion Type: Recommended "Brim" or "None". Adding a brim helps the printed model to stick to the printing bed, and is especially necessary if your model is tall or narrow. If your model has a wide flat surface at the bottom you may not need a brim.
- Filament Diameter (mm): 2.85 mm
- Flow Rate (%): 100%
6. When you have your model situated correctly and the settings finalized, you can save the .gcode file to an SD card by selecting the "Save G-code" option.
7. To use the printer, simply insert your SD card and select your file to print. The machine will heat up and then start printing on its own. Provided you set the temperature settings correctly in Cura you shouldn't need to adjust any other parameters. (Optional: you may want to adjust the cooling fan speed on the printer, which can help with delicate models. Ask a Maker-ninja for help if you need it.)
8. Your print will likely take a while. Once you've confirmed that it is printing the way you want, you can leave and come back later to pick up your model. Please leave a small note with your name and (optionally) a phone number, so that people know who's model is printing or can contact you if something goes wrong.
9. When your print is finished, allow the print bed to cool down before attempting to remove your print. You shouldn't try to remove your print until the bed temperature has cooled to at least 40 C.
As always, if you have problems or questions about using the machines, don't hesitate to ask someone else. The Tulane MakerSpace is a student-run facility, and often there will be someone available who can help you with whatever questions you have.
Good Luck, and have fun!