Jason Schuster

Bio
I grew up on a farm, and have been a DIYer, Maker, Fabricator my whole life. I attended the University of Nebraska at Lincoln and earned a Bachelor's in Science in Mechanical Engineering. I then went to industry as a Design Engineer. In 2015, I was looking for a change from Agriculture and Construction equipment to the Biomedical Engineering field, Now at Tulane I am working towards a PhD as a Research Assistant with a goal of staying in academia and teaching new generations how awesome science and engineering is!
If you see me in Makerspace, say hi and introduce yourself, I am always happy to help out.
Outside of Tulane, my favorite activity is cycling, My favorite bicycle race is the Leadville 100MTB, it is an endurance mountain bike race with a 12 hour cutoff, riders must complete a 100 mile course, at an average elevation over 10,200 feet in Leadville, Colorado. My finishing record is 4 for 4. Leadville Race Series website

Jason Schuster Maker Ninja PhD Candidate Department of Biomedical Engineering Lab Website: Biomechanics of Growth & Remodeling Lab Email: jschust5@tulane.edu
Maker Skills:
- 3d Printing: Laser Cutter, Lathe, Mill, Woodworking, Sand casting
- Welding: TIG, MIG, Stick, & Oxy-acetylene
- CAD: Solidworks, AutoDesk Fusion 360, Pro/Engineer CREO, Geomagic/Cubify Design
- CAM: AutoDesk Fusion 360, Inventables Easel
- 3D Printing: Cura, Sprinter Firmware, Slic3r,
- Graphics: Inkscape, Adobe Illustrator, Adobe Photoshop, GIMP
- Programming: LabVIEW, MATLAB, Mathematica
- Makerspace Training Certifications:


- Learning: blender
Tulane Makerspace Project Portfolio
-
Made on the Carvey - 2 Color HDPE -
Tissue Stamp - CNC Milled Precision Stamping Fixture -
Tissue Stamp - CNC Milled Precision Stamping Fixture -
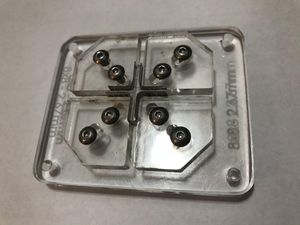
Tissue Stamp - Laser Cut Acrylic -
Wood 1 Push Stick -
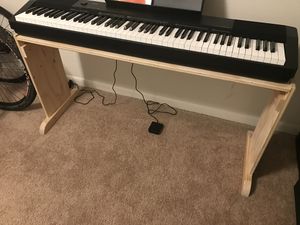
Keyboard Stand -
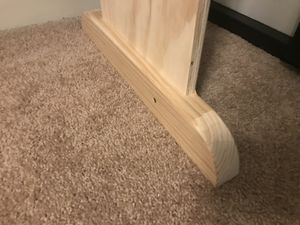
Keyboard Stand Detail -
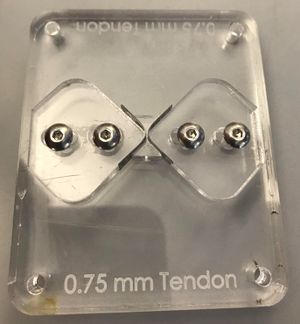
Dogbone stamp for mouse patellar tendon. Thats 0.75mm between the blades! Laser cut acrylic -
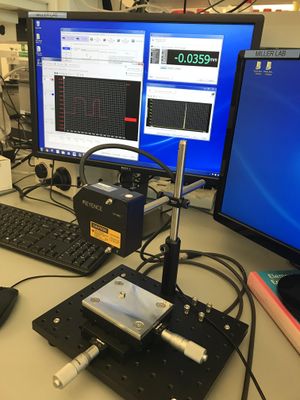
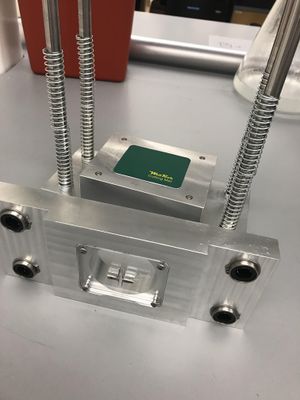
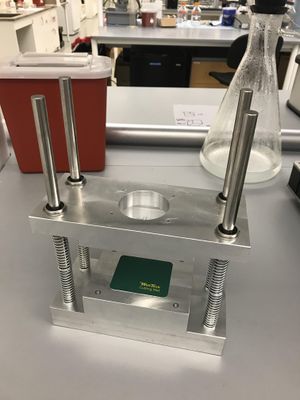
Keyence laser caliper and Thorlabs fixture -
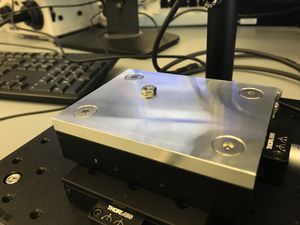
Surface plate for laser caliper - Made on the Tormach CNC Mill -

Unconfined compression plattens - Made on the Tormach CNC Lathe -
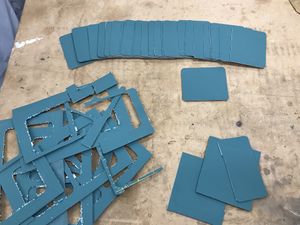
cutting mats for tissue stamps - Made on the Carvey -
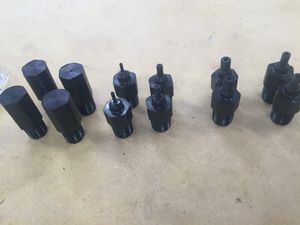
Added the hex to these previously made canula parts - Made on the Tormach CNC Mill -
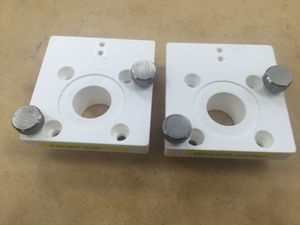
Top and bottom biochamber brackets, I added the shallow large diameter countersink to each part. A collar fits into the countersink and will align the test fixtures mounts - Made on the Tormach CNC Mill


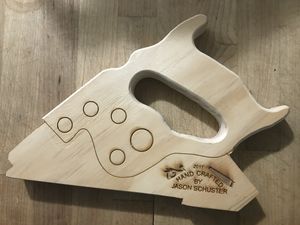
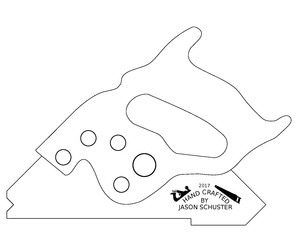
Wood 1 Saw Handle Push Stick Pattern
If you would like to make a saw handle push stick for fun or for your Wood 1 training, here's the file! I laser engraved this pattern onto the piece of wood and then brought that to class, however, you could alternatively use the OLD SCHOOL CUT AND PASTE method! Yes, you guessed it: print the handle onto paper, cut it out with scissors, and then trace the design onto the wood. Not as technically cool, I know, but you will still end up with an awesome saw handle push stick (which could be engraved later!). Click on the image below and follow the "original file" link to download the PDF.
Custom Cycling Shoes Old World Artisan & Craftsman Project
This year (January 2018) I have decided to start a long term project to make my own custom footwear! Shoe styles the world over are driven by elegant form NOT function! You know what I'm talking about; the extreme examples are narrow or pointed dress shoes! I don't know anyone with a foot that narrow and toes forming a pointy triangle... There is a new wave of shoe companies now making wide toe box shoes, which are actually shaped like your foot. Running and daily shoes are available (e.g. Altra Running Shoes), however no one is yet making a cycling shoe. Cycling shoe companies are notorious for making super narrow shoes. It is possible to buy custom made shoes (e.g. Rocket7 Cycling Shoes), Rocket7 makes some awesome shoes, but the custom work also has a custom price. I think I can Do-It-Myself for a fraction of the cost and it will be fun!
I am going to use the latest technology when possible, however, most of this project will require learning an old world artisan skill, which is something I enjoy doing, I am going to document the journey here.
- STEP 1: Create a 3D CAD model of my feet. The Tulane Makerspace has an iSense 3D scanner, Here are images of the test scans I did for a proof of concept. These models need cleaned up, but the iSense can do what I need it to.


UPDATE: The Biomedical Engineering Department has a Creoform Go! 3D Scanner, this is a tremendously better scanner. Here's a couple images where we scanned my insoles.
- STEP 2: After completion of the 3D models, I will next be creating a "last" this is the foot form that shoes are built on. Maple hardwood is the best material to use for a last. I am planning to use the Tormach CNC Mill to transform the 3D model into a wooden last shaped just like my foot.

- STEP 3: Create the patterns - There are a lot of videos on youtube for how to do this.
- STEP 4: Materials - I have been scavenging eBay looking for old cycling shoes I can cut up and use the hardware from. Figuring out where to buy synthetic leather, foam, and fabrics is going to take some time and research. Finding materials may actually be one of the hardest parts of this project.

- STEP 5: Hand Tools: The best tools look to be made by CS Osborne, there's a few specialty tools I'll be needing. I already own the primary and most expensive tool for this project, which is a heavy duty walking foot sewing machine.
- STEP 6: The Sole - Originally, I was planning to do a carbon fiber layup, but after investigating it, I think I will start with fiberglass & resin, I think it will be a much simpler plan since I already have some experience with these materials.
Exorcist3D YouTube Channel
Here's my YouTube channel, several videos of my 3D printer and South Bend lathe are found here:
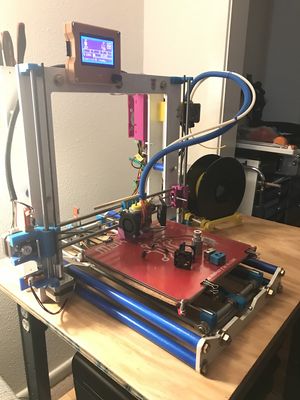
OpenSource 3D Printer
In 2013, I built my own opensource 3D Printer. I modified the Prusa i3 design. Controlled by: Arduino Mega + RAMPS 1.5 with Sprinter firmware. The frame is made from 1/4" laser cut steel plates and 3/4" lathe turned rods. The build surface is heated and has a 10" x 10" x 10" build volume. Recently, I made several improvements and upgrades, which include a large screen LCD with SD card reader, X-axis belt tensioner, print cooler fan, and a genuine E3D Titan Extruder, which I mounted Bowden style (filament drive is remote mounted like the Ultimaker configuration). Many of these upgrades were printed in the Makerspace! Detailed list below. Future upgrades include a BL Touch auto bed level and 1.75mm genuine E3D V6 Nozzle.
   Several of the parts I printed in the Makerspace:
   * Tan LCD display box
   * Purple X-axis belt tension bracket
   * Purple Arduino & Ramps box
   * Purple Printer cooler fan shroud
If you are interested in building your own open source 3D printer, I suggest starting here: Reprap.org Also, the Lulzbot Taz machines are open source, all files to build their machine is available on their webpage! Same for the new Prusa printer recently added to the lineup.
-
Exorcist3D Printer -
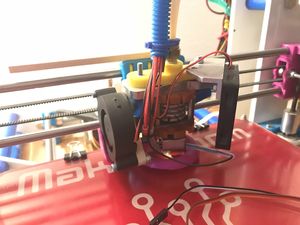
3mm Budaschnozzle to be replaced -
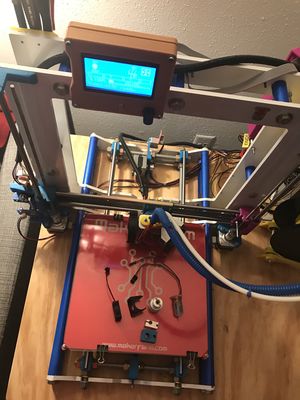
View from above -

Upgrades Waiting: 1.75mm E3D V6 & BL Touch


1934 South Bend Lathe Restoration & Projects
Over Christmas break 2017, I machined some small parts for my lab. These parts are cannula, used to mount soft tissues on our inflation-extension test device. The material is PEEK plastic, it can be auto-claved and machines nicely. Check out my YouTube link above, there is a quick video of the PEEK being machined. The lathe I used is a 1934 Southbend 9" Workbench 405. This lathe is a restoration project I completed in 2010.
-
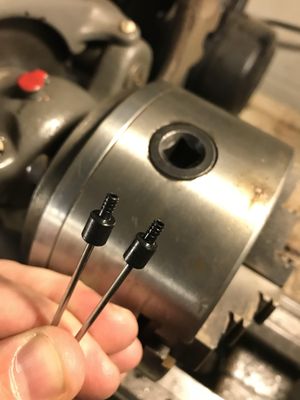
3.0mm Cannula -
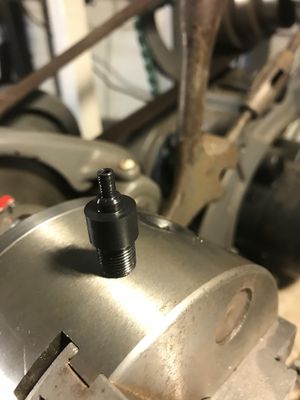
1/8"NPT to 3.8mm Cannula


-
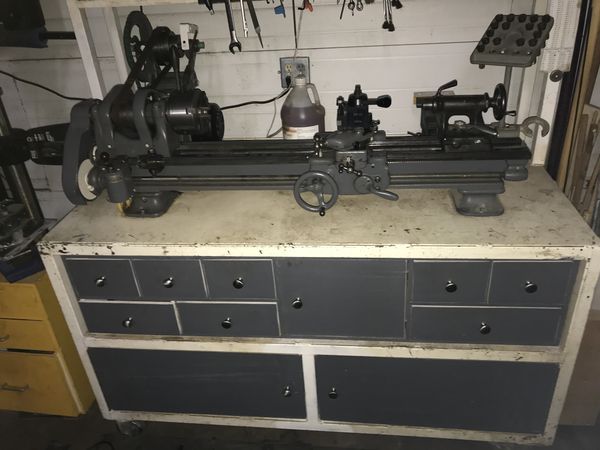
1934 Southbend 405 Lathe -

X-axis fine adjustment -
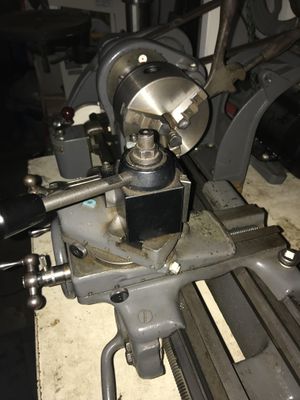
Updated tooling post


Last Update
JasonS 12 February 2018